Some Mics for the Kodak Zi8

I’ve been touting the Zi8 as a low priced tool for “look at me” YouTube videos because it allows the use of an external mic. It’s usually the case that our preferred framing for a shot moves the camera some distance from the subject. This means that the sound recorded by the camera mic is heavily affected by the sound of the room, and that is rarely a good thing for sound quality.

By separating the mic from the camera, I should be able to position the mic for optimum sound while placing the camera for the visual effect I want. Of course, I can do this wihout an audio input on the camera by a technique called parallel recording, that is, recording on a separate audio system of some kind. The familiar clack of the slate at the start of a movie sequence is used to make it easy to synchronize the picture and sound, and this technique works very well for my homebrewed videos as well. Still it’s very tempting to think that recording directly to the camera is an easier way out, with camera audio every take and every edit lining up without any extra effort. (more…)

Field Recorder Comparison

For sheer acoustic guitar and recording fun, it’s hard to beat a visit to Doug Young‘s garage studio. Doug is a fantastic player, very knowledgeable recordist, and has some swell guitars sitting around his great sounding studio space. As an aside, he has done all us acoustic guitar players a huge favor by compiling a great set of pickup samples on his web site. His CD is definitely worth adding to your collection, and his articles in Acoustic Guitar Magazine are always good reading as well.

But for this occasion, I went to take advantage of his extremely cool Sound Devices 744 digital recorder. This is a top of the line system, used widely for major motion pictures or any other situation where great sonics, ruggedness, and portability are needed. I came for a shootout between his “king of the hill” unit and my much more modest recorders, a Fostex FR2-LE and a Zoom H2. Once I arrived, Doug suggested that we add his Edirol R09 to the mix, so we had four field recorders to compare.

I brought along my Wingert Model E tuned to G Wahine (D G D F# B D), a great old slack key tuning. Doug kindly hooked up his Schoeps CMC 6 mic bodies with his MK41 supercardioid capsules, one into his Sound Devices, and one into the Fostex. Then we rigged the Zoom and Edirol on stands to bring them close to the same position. Here’s what the setup looked like:

and here’s a shot from over the mics and recorders:

The Schoeps are directly over one another, so the bottom one disappears in this overhead shot.

In some rooms, this setup might not be tight enough to give an accurate comparison, but Doug’s studio is very well treated with broad band absorbers, so the sound is clean and even in most locations. Doug’s room is also extremely quiet, so we got some nice long “tails” as the last note of the clip died away. This will give you a chance to compare the internal noise levels of the different recording chains. One embarrassing caveat – we left the Edirol R09 in MP3 mode instead of 44.1 wave, so that little guy may be suffering some quality degradation. We didn’t realize our error until we’d used up all our time for the evening. Apologies to Edirol and R09 fans.

After the recording session, I brought the clips into my Adobe Audition 3.0 where I trimmed them as accurately as I could to the same starting point and length. (Once again I forgot to “clap” the start of each clip to get a synchronization point – the learning never ends.) I converted the H2 and R09 clips to mono by using the louder of their two tracks. Then I used AA3’s group normalize feature to bring them to the same average loudness. Loudness differences have a tremendous impact on the listener’s sonic evaluation, so I wanted to level the playing field in that aspect. I think average perceived loudness is more useful than peak normalization in this situation, and after processing I listened to the samples on my Dynaudio BM 6 monitors and thought their levels were extremely close.

Now for the samples. Just for fun I’ll post them blind, so you can download them and compare without prejudging. These are .wav files and fairly large, but we wanted to preserve the fidelity so you can make a better comparison.

Sample 1
Sample 2
Sample 3
Sample 4

Now after giving a good listen to these clips, you can see the key here and evaluate the results. I hope you find these comparisons useful, and that you’ll leave a comment or send an email sharing your impressions.

As always thanks a ton to Doug for being so generous with his time, space, and gear.

Very Inexpensive Microphones

From what I’ve read on various internet forums, it’s much easier to make a good omnidirectional (or non directional) (or just omni) mic than it is to make a good directional mic. And as a result it should be easier to find good, cheap omni mics, which would be great for me, because I love them. They can be placed very close to the source because they don’t have the proximity effect that occurs with directional mics. They seem to capture a big, clear, realistic sound very easily.

The problem has been that there are not a lot of omni mics around. The market doesn’t seem that interested in omnis, so the manufacturers are not interested. In the five years or so that I’ve been recording and buying gear, I would guess that models of directional mics in the marketplace outnumbered omnis by 20 to 1 or more, and almost all the hip new inexpensive mics have been directional.

In the last year or so, though, Jon O’Neil and his Naiant Studio Store has begun selling a very inexpensive omni microphone which Jon builds himself. He use readily available capsules, adds his own active electronics, and mounts the whole thing in an XLR connector shell. The result is compact, rugged, and inexpensive. I think they work pretty well, too. Here’s a brief comparison of a pair of Naiant MSH-1 omnis to a pair of DPA 4061s:

Naiant MSH-1
DPA 4061

The DPAs carry a list price of $429, and they require an adapter to connect to standard mic preamps that adds about $75 to the cost. Even used they cost about 10 times as much as the Naiant MSH-1 costs new. It’s certainly true that the DPA can be used in more applications, because it’s very small and unobtrusive, and the two different mics are not equivalent, but just on the basis of sound quality, I think they’re amazingly close.

This year Naiant began selling the MSH-2, a mic based on a larger capsule. Jon describes this mic as having lower noise and a gently falling high end compared to the MSH-1. I’m a sucker for an inexpensive omni, so I ordered up a pair. Here’s a recording using one of these new mics alongside an industry standard for microphone quality. I’m using a John Hardy M-1 preamp and Lynx2 converters. This time I set up the Naiant MSH-2 on one channel and a Schoeps CMC6/MK2 on the other. I mounted the mics so they were a few inches apart and about 6 inches from the Martin OM-18GE. Here are the two mono files that resulted:

Naiant MSH-2
Schoeps CMC6/MK2

I can hear some slight differences, although they’re pretty subtle. By turning up the volume and listening to the extended “tail” or decaying signal, I can hear a higher noise level in the Naiant track. But considering that the Schoeps costs about $1400 and the Naiant costs $35, I’d call the similarity pretty amazing. Certainly if someone asked me for an inexpensive microphone to record solo acoustic guitar, I’d be quite comfortable recommending the Naiant MSH-2.

Mic Preamps Compared

When I read about preamps at various internet forums and newsgroups, I get the impression that microphone preamplifiers are a significant variable in the recording chain. And yet, when I’ve compared preamps, I don’t notice that much difference. Well, I do notice a difference if I crank the gain all the way up. Less expensive preamps tend do be noisy in their upper gain ranges. If I’m using my old faithful Beyer M260 ribbon mics, I need all the clean gain I can get from my John Hardy M1 mic pre. But if I am using a condenser mic with plenty of output, the mic pre is operating in the middle of its range, and I don’t hear much difference between a decent $150 unit and a decent $1500 one.

Now I know that preamps are used as effects, either blatant or subtle. The blatant ones are inexpensive units with a starved plate tube glowing prominently through some grillwork and a “drive” control to mix distortion generated by this tube into the signal. The more subtle ones often refer to various recording consoles as their inspiration, claiming Neve-like or API-ish qualities. I’ve never experimented with units like these. There may be huge differences between preamps when they’re used on vocals, drumsets, electric guitar amps, or exotic percussion, I just wouldn’t know. My focus is always on simple solo fingerpicked acoustic guitar recordings, where accuracy and clarity are my goal.

Many preamps aim to be accurate. The classic description of an accurate preamp is “a straight wire with gain,” an impossible achievement but an easy ideal to visualize. Product literature and user comments include terms like detailed, musical, natural, transparent. Inferior versions of these accurate preamps are described in internet forums as flat, boring, or two dimensional. Since I have a few preamps around these days I decided to try to do some comparison tests. As always with comparisons like this, the source material is a key issue. I decided to try to run one microphone through all three preamps at once, so the input signals would be the same. Making this connection is fraught with problems. If I connect the mic directly to the three inputs, the input impedance seen by the mic will be quite low, and may affect the mic response. If I use a transformer splitter or active buffer/splitter, the sonic signature of the splitter will be stamped on all the samples. My decision was easy, though, because I already have a box that lets me rig up a passive connection direct to the three inputs. If the mic response is affected, I’ll assume (until I’m shown otherwise) that the response is still the same for each preamp.

The key to this setup is a Coleman Audio LS3 switch box. I normally use this box to select between my headphone amp and monitor amp, but since it’s a completely passive box it works to route inputs or outputs equally well.

The three preamps under evaluation are the John Hardy M-1 as mentioned earlier, along with an FMR RNP and an M-Audio DMP3.

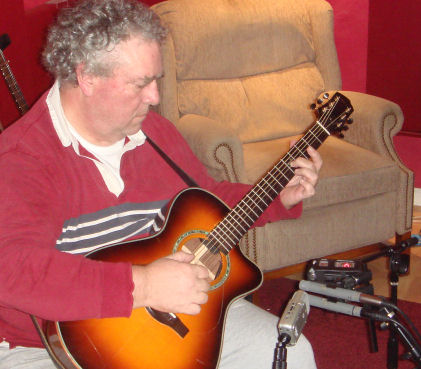
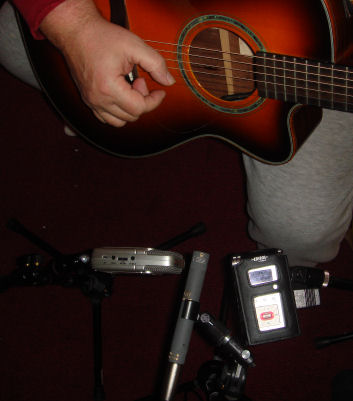
For the first test, I selected an Audio Technica AT4041 small diameter condenser mic. I routed it through the Coleman LS3 to the left channel of each preamp, then connected the left output of each preamp to an input of my LynxTwo C. I matched the volumes rather roughly using pink noise generated by Adobe Audition 1.5 and the metering on the Lynx software mixer. I set up a multitrack session in AA 1.5 to record three mono tracks from the three preamps. I positioned the AT4041 about 12″ from the 12th fret of an Epiphone Masterbilt EF-500M tuned to “drop C” tuning – CGDGBD low to high, and played a brief bit of noodling. After I listened to the tracks I realized I had not matched the levels well enough, so I normalized all the tracks to -3db. Here are the three sample tracks, mono 44.1/16 wave files:

Sample 1
Sample 2
Sample 3

Finally, I thought I would include a comparison with a dynamic mic as the source. It would require more gain from the preamps, and might be useful to folks who only have handheld dynamic stage mics in their collection. This time I used an Electrovoice RE16, connected as before. Again I set levels using pink noise and the Lynx software mixer, then recorded in a multitrack AA 1.5 session. This time the level matching was more accurate, so I didn’t feel the need to adjust the levels after recording. Naturally the performance is different from the first recording, AND THE ORDER OF PREAMPS IS DIFFERENT:

Sample 4
Sample 5
Sample 6

I hope you’ll download these and give a listen. Does one track in each set stand out from the others? Is one more transparent, another lifeless? Can you tell them apart? Perhaps you’d like to know which sample was created by which preamp? Click here for the key to relate the samples to the preamps used to create them.

PS – After I posted these, and after I sold my FMR RNP, people pointed out that the DMP3 samples were high-passed – that is, the DMP3 LoCut switch was activated, causing a shelving rolloff -3db at 72hz, 18db per octave. This may affect the comparison for some listeners and some playback systems.

iOS Tools for LAMPG Videos

LAMPG – Look at Me Play Guitar – is certainly not the most absurd video genre we find on YouTube, but then that’s not a very high barrier, is it? For those of us who are not stars already, most of our videos will get only a handful of hits, make no money, and bring us no recognition, fame, or even infamy. But with all this I still find it more fun to make a good video than a bad one, so I’m always trying to learn to make these little movies better. (more…)

Rode NT1a vs ADK A6 plus Two

There are a number of comments I expect to hear when microphones are discussed. Someone is likely to call the Rode NT1a harsh, strident, shrill, or some similar indication of high frequency problems. And when asked to recommend a mic for recording acoustic guitar, the ADK A6 is one of the more common responses. So how obvious are the differences between these two mics in a four way blind comparison? (more…)

iRig Acoustic Stage Comparo

Those folks at IK Multimedia have figured out how to trigger my impulse buy urge and they did it again with the iRig Acoustic Stage. The iRig Acoustic is a sound-hole mounted MEMS mic that plugs into a smartphone. The Stage version comes with an MEMS mic and a preamp/mixer. This Stage preamp offers tone control, anti-feedback, and the ability to mix an external source. (more…)

Look At Me Play Guitar – Sony HDR-MV1 vs Canon HF R500

I read lots of posts by guitar players and other performers who want to shoot video of themselves performing. They want decent quality video with decent or better audio, usually on a budget. And they usually don’t want to embark on a technical education project or take up a new hobby, they just want to point and shoot and play. (more…)

« Previous PageNext Page »


About the Blog

    Howdy, my name is Fran Guidry and this is my Homebrewed Music blog.

    I play Hawaiian slack key guitar and recorded my solo acoustic CD at home. Most of the recording information I find on the internet seems focused on bands, drums, multitracking, and so on but my main focus is recording solo acoustic guitar. Lately I’ve been enjoying video recording along with audio, so that shows up in the blog as well.

    I’m also a guitar nut. I love big ones and little ones, handmades and factory guitars, cheap ones and expensive ones. So I’ll be sharing the fun of exploring guitars as well, along with the challenges of amplifying acoustic guitars for live performance.

    Welcome!

Philosophy

    My recording philosophy is pragmatic, skeptical, not super critical. After all, the performance is by far the most important component of a track, and every aspect of any recording is a matter of taste.

    But I do like to know “about stuff.” Back in hifi days I learned about double blind testing. I learned that we humans can easily hear differences that don’t really exist. The more I’ve learned about our human auditory system, the more I’m skeptical of what people say they hear, especially if they claim that a particular microphone or preamp or cable has some magical property.

    I’ve only been recording since 2001, and when I started I found the usual places on the internet. I sought advice and accepted it, thought I would improve my recordings by using more expensive equipment. It didn’t work.

    Two things that did seem to lead to better recordings were experience and room treatment. Getting an appealing sound is the combination of many small details, and learning those details only comes from experience. Amd the sound of the recording space is obviously a big factor.

    I’ve only recorded seriously using digital technology, but I remember trying to record rehearsals and gigs back in analog days. I don’t have any nostalgia for analog recording and playback systems at all. I think even low end digital systems can capture marvelous recordings. So when I look at gear, I look for good specs: low noise, broad flat frequency response, wide dynamic range, low distortion. I’m not interested in colorful components, mics and preamps with a sound, I want the sound to be the sound of my guitar.

    But the last word is that I’m just learning and I hope you find something useful in my posts.