Room EQ Wizard – free room evaluation software

Friday, February 13th, 2009

During the learning process that was my first CD I found Ethan Winer and learned a bit about his ideas for improving the acoustics of small rooms. Since then I’ve learned about the Acoustics forum at StudioTips.com, another great source of information on small room acoustics.

Even though it’s not strictly necessary, it’s interesting to use some kind of acoustic measuring tool to evaluate the room and gauge the results of treatment. I recently learned of a free program that works with a PC or Mac and their audio systems to measure and display room response. It’s called Room EQ Wizard and it’s available for download at the Home Theater Shack. The Shack is a discussion forum focusing on home theater (well, duh), but Room EQ Wizard, or REW as they call it, is just as useful for recording spaces as it is for home theater.

The home theater users seem to have systems that are a bit more complex than my simple recording rig. I don’t have a subwoofer and accompanying crossover, nor do I have an equalizer in my playback chain. So my connections were simpler than those illustrated in the REW help pages.

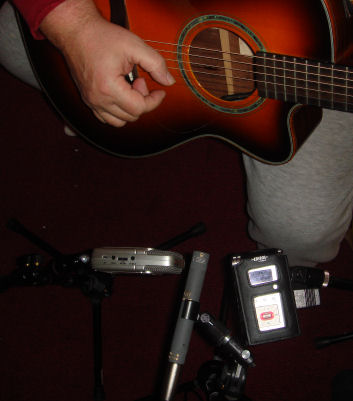
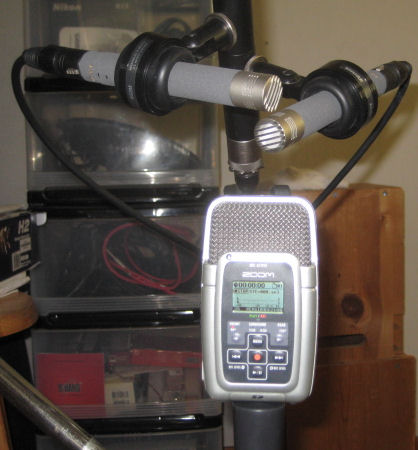
I bought one extra piece of equipment for this project, a Sound Pressure Level (SPL) meter. These are available from Radio Shack and other sources. The Radio Shack unit I bought is accurate enough to measure a baseline volume setting for all my readings. It’s possible to use the SPL meter as the measurement mic, but it is not accurate above about 3Khz, fine for tuning subwoofers but not much help for a full range monitor system. The Behringer ECM8000 is widely recommended for an inexpensive measurement mic, but I have a couple of DPA 4061 miniature omni mics in my collection, so I chose that for my measurement mic.

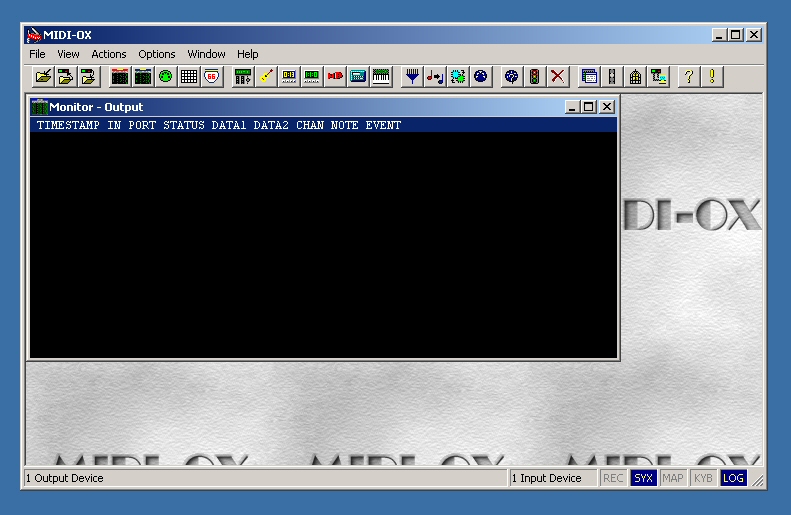
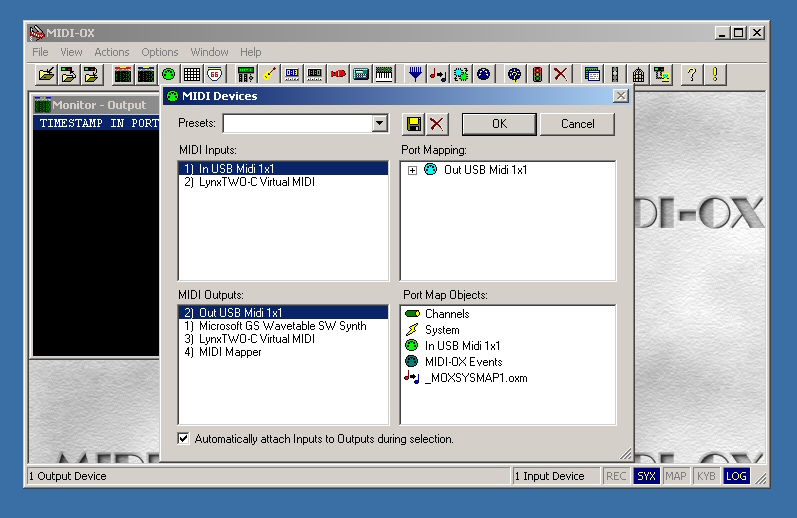
The first step in using REW is a soundcard calibration procedure. This procedure compensates for nonlinearities in the soundcard and also ensures that the basic system is working, with REW finding the soundcard inputs and outputs as needed.

I use a LynxTwo-C soundcard and REW found it easily. Here’s the Settings page where the soundcard is configured and measured.

settings-soundcard

The soundcard calibration starts by creating a loopback connection, that is, the output of the audio interface is connected to the input. This is easy with a recording oriented system, where balanced line in and line out connectors should be available. On the Lynx breakout cable the XLRs just clicked into place. On other systems a male TRS to male TRS may be needed. Don’t forget to turn off your power amp or mute your speakers – now how would I know to remind you about that??

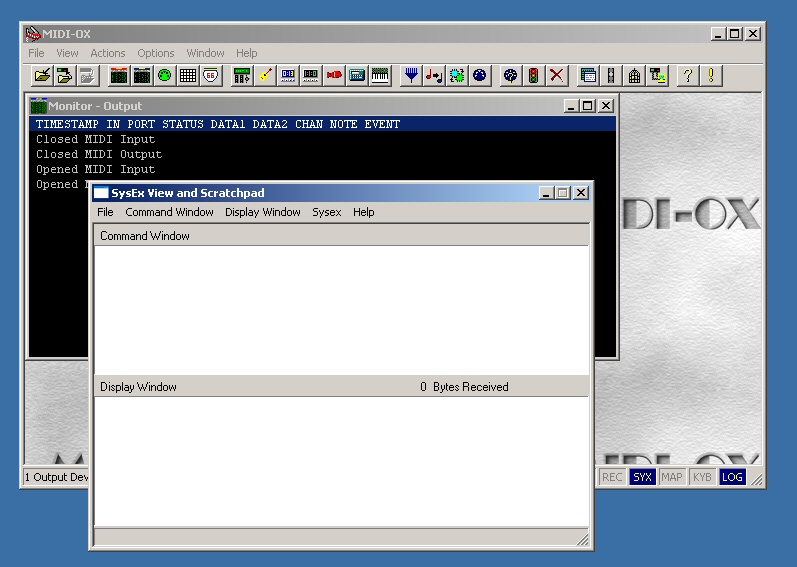
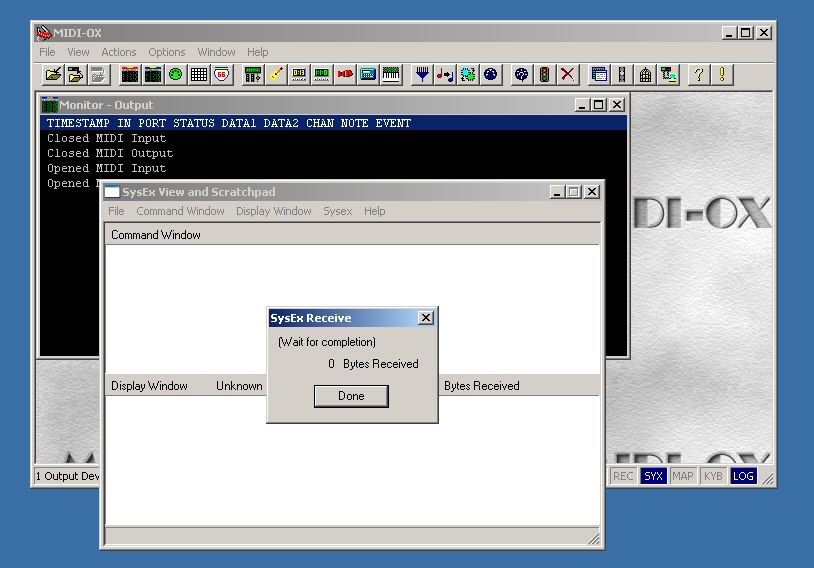
I’ve created a YouTube account for videos related to the blog. You might stop by http://www.youtube.com/user/homebrewedmusic if you’re in the neighborhood. This video goes through the steps to run the calibration measurement.

After saving the soundcard calibration file we need to adjust the levels so we’re getting a good signal to noise ratio but avoiding clipping. First we restore the loopback connection to our normal hookup and turn on our power amp or unmute our speakers.

This video demonstrates the steps:

Since we’re moving these input and output volumes all the time we’ll probably need to run this level adjustment routine before taking measurements.

With the levels set we’re ready to measure our room/speaker response. Well, actually we’re also including the mic preamp and power amp, but those are probably quite linear, especially compared to our room and speakers.

Here’s a screen video of the measurement process.

And here’s the resulting graph. Looks pretty ragged to me, with huge swings between 40 hz and 200 hz, and lots of comb filtering in the higher frequencies. I suspect that this is the normal response of a medium small room. In our next entry we’ll see what we can accomplish with our current batch of broadband absorbers.


We’ll miss Lance McCollum

Monday, February 2nd, 2009

On February 1, 2009, Hank Mauel posted the following message on Usenet news group rec.music.makers.guitar.acoustic:

It is with great sadness that I write of the passing of Lance McCollum. He suffered an aortic aneurism early Sunday morning. He was rushed into emergency surgery at Auburn Faith Hospital but the damage was too massive to overcome.

Please pray for his wife Dawn and their children in this hour of need.

There will be no memorial sevice per his wishes. He will be cremated and his ashes scattered at sea over the Southern California area he surfed as a youth.

He will be greatly missed by a broad group of people, myself at the top of the list. He was a friend, mentor, musician, luthier and all around great guy.

Please direct any correspondence to my email and I will forward it to his wife, Dawn, at the appropriate time.

Hank Mauel
Mauel Guitars

Lance was a devoted family man, a fearless artist, a consummate craftsman, a mad adventurer, a passionate enophile, a compelling conversationalist. His guitars added a real measure of beauty to our shared world, so we – all of humanity – are richer for his time and energy.

If you’re not familiar with Lance’s work, you can see some examples at his web site, which was designed by his daughter.

Lance was a regular at our guitar parties, and his guitars were often the stars of the event. You can find pictures of Lance, his wife Dawn, and his guitars in the picking party pages.

Lynn and I will miss Lance, and our hearts go out to Dawn and the kids.

Fran


Welcome to the new Homebrewed Music

Monday, January 26th, 2009

Howdy, and welcome. I’ve been blogging about acoustic guitars and recording for few years now and recently decided to switch to the WordPress platform. I’ll transfer the content from the old blog, but unfortunately I haven’t figured out how to transfer the comments. I’m also unable to make the old permalinks work, so those will turn into dead links.

I hope you find the information in this blog of interest and value, and I hope you’ll join me in the fun of making home brewed music.

Fran


New Guitar – Epiphone Masterbilt EF-500RCCE

Saturday, January 12th, 2008

I’ve owned an Epiphone Masterbilt EF-500M for a few years now. It is a very functional instrument that I bought for a very reasonable price. As a result, I’ve been curious about the relatively rare EF-500RCCE model for some time. When a 2nd showed up on Ebay for a reasonable price I snagged it. Here’s a pic:

The EF-500 is the 000/OM body size. R indicates rosewood back and sides. The first C stands for cedar top, the second for the cutaway. And the E says it has built-in electronics. The electronics are listed as a Baggs pickup, and since there’s a battery inside there must be some sort of preamp or buffer amp as well. There are no controls mounted in or on the guitar, though, so I’ll have to use an external preamp for tone and volume adjustments. Like all the EF-500 models this one has a 1 3/4 nut width. Unlike the others I’ve tried, it has a modified oval neck shape instead of a V. It also has very slightly narrower bridge spacing, 2 5/16 instead of 2 3/8.

My Epi Masterbilt EF-500M came with a decent semi-hard case. Gibson recently revised the line and now does not include the case in the base price of the instrument, so I’ll be carrying this one in a gig bag.

As I mentioned, this is a 2nd, a QA reject. While many 2nds have invisible issues, the big sap streak in the top makes it clear why this one went on the reject pile:

Luckily I’m not a fanatic about the appearance of my guitars, so I’m glad to get a price break because of this flaw. However, there are two other issues, one minor but annoying, the other serious.

The minor issue is the routing of the pickup wiring – it’s downright sloppy, hanging from the top and touching the bottom, so that I sometimes hear a sympathetic vibration buzzing along with the notes. I will fix it with a few bits of tape, but I hope other E models are put together a little more carefully.

Here’s a shot of the battery wire hanging down:

and here’s the pickup lead also hanging:

In the second shot you can also see the “broom handle” back braces, much more substantial than I see in higher end instruments.

The significant problem with this guitar is the saddle. It’s leaning forward, which is a definite structural problem.

My shot isn’t great for showing the tilt, but it shows the gap behind the saddle clearly. This incorrect construction will likely lead to early failure of the bridge, requiring a somewhat expensive fix. I plan to have the saddle slot rerouted at the correct angle and an oversized saddle fitted to correct the problem, but it is playable in the meantime.

Obviously if I think it’s worth fixing the saddle, I’m pleased enough with the guitar to want to keep it. The playability is just fine, the sound is a bit rough but quite loud, and it’s just generally a fun guitar to play. The cutaway is a big part of the fun, since I do a fair amount of playing around and above the 12the fret. Because of the broad neck heel the cutaway fits smoothly against it, giving a very clean appearance.

Since the real point of a guitar is making music, I put up a Shure KSM141 mic in omni mode, fed it through my John Hardy M-1, and captured a brief clip. I used this setup to give the most accurate picture of the guitars tone, rather than the most flattering recording, and I think the clip is pretty successful in conveying the sound of the guitar in this room.

Sample recording

Note that this is a WAV file rather than an MP3 so the download will take a bit longer. I prefer to use WAV format to maintain the best fidelity.

To summarize my feelings about this guitar, I continue to be amazed by the price/performance ratio of these Epiphone Masterbilts and other recent all solid wood instruments from China. While the construction details, playability, and sound are a step down from a Martin Vintage series (or Standard or 16 series for that matter) this is a functional instrument that’s fun to play, one I would use in just about any situation without feeling shortchanged.

* * * * * * * * * * * *
UPDATE!
* * * * * * * * * * * *

I started doing a little in depth fiddling with the Epi and made a couple of discoveries. Since I had the strings loose I pulled up the saddle to see what kind of Baggs pickup is installed, and the answer is, no Baggs at all! Instead, I found an Artec PP607. Hmmmmmm, is that legal, since the Epiphone site states very clearly that the pickup is a Baggs?? I’m sure they have a disclaimer in there somewhere but this doesn’t give me a lot of confidence in the Masterbilt operation.

The extra thickness of this multi-layer pickup may be responsible for part of my saddle problems as well.

Next I checked the battery holder, to see if I should replace it with my favorite, the B-Band “bag.” Well the answer is YES because the existing holder was barely clinging to the velcro patch. Believe me this a serious problem, because a 9 volt battery banging around loose inside a guitar can do a LOT of damage.

I’m still keeping this guitar for now, but these two discoveries certainly take some of the rosy glow off our relationship.

* * * * * * * * * * * *
UPDATE 2!
* * * * * * * * * * * *

With a little further research I have learned that guitars that pass through the refurb shop, like this one, apparently have the Baggs pickup removed and replaced with the Artec. Something to watch for when you purchase a 2nd with electronics.


Field Recorder Comparison

Saturday, January 12th, 2008

For sheer acoustic guitar and recording fun, it’s hard to beat a visit to Doug Young‘s garage studio. Doug is a fantastic player, very knowledgeable recordist, and has some swell guitars sitting around his great sounding studio space. As an aside, he has done all us acoustic guitar players a huge favor by compiling a great set of pickup samples on his web site. His CD is definitely worth adding to your collection, and his articles in Acoustic Guitar Magazine are always good reading as well.

But for this occasion, I went to take advantage of his extremely cool Sound Devices 744 digital recorder. This is a top of the line system, used widely for major motion pictures or any other situation where great sonics, ruggedness, and portability are needed. I came for a shootout between his “king of the hill” unit and my much more modest recorders, a Fostex FR2-LE and a Zoom H2. Once I arrived, Doug suggested that we add his Edirol R09 to the mix, so we had four field recorders to compare.

I brought along my Wingert Model E tuned to G Wahine (D G D F# B D), a great old slack key tuning. Doug kindly hooked up his Schoeps CMC 6 mic bodies with his MK41 supercardioid capsules, one into his Sound Devices, and one into the Fostex. Then we rigged the Zoom and Edirol on stands to bring them close to the same position. Here’s what the setup looked like:

and here’s a shot from over the mics and recorders:

The Schoeps are directly over one another, so the bottom one disappears in this overhead shot.

In some rooms, this setup might not be tight enough to give an accurate comparison, but Doug’s studio is very well treated with broad band absorbers, so the sound is clean and even in most locations. Doug’s room is also extremely quiet, so we got some nice long “tails” as the last note of the clip died away. This will give you a chance to compare the internal noise levels of the different recording chains. One embarrassing caveat – we left the Edirol R09 in MP3 mode instead of 44.1 wave, so that little guy may be suffering some quality degradation. We didn’t realize our error until we’d used up all our time for the evening. Apologies to Edirol and R09 fans.

After the recording session, I brought the clips into my Adobe Audition 3.0 where I trimmed them as accurately as I could to the same starting point and length. (Once again I forgot to “clap” the start of each clip to get a synchronization point – the learning never ends.) I converted the H2 and R09 clips to mono by using the louder of their two tracks. Then I used AA3’s group normalize feature to bring them to the same average loudness. Loudness differences have a tremendous impact on the listener’s sonic evaluation, so I wanted to level the playing field in that aspect. I think average perceived loudness is more useful than peak normalization in this situation, and after processing I listened to the samples on my Dynaudio BM 6 monitors and thought their levels were extremely close.

Now for the samples. Just for fun I’ll post them blind, so you can download them and compare without prejudging. These are .wav files and fairly large, but we wanted to preserve the fidelity so you can make a better comparison.

Sample 1
Sample 2
Sample 3
Sample 4

Now after giving a good listen to these clips, you can see the key here and evaluate the results. I hope you find these comparisons useful, and that you’ll leave a comment or send an email sharing your impressions.

As always thanks a ton to Doug for being so generous with his time, space, and gear.


G Natural – Saving User Settings

Tuesday, December 11th, 2007

I ran into a little problem when I upgraded the software in my G Natural to the 1.03 release. I have to confess that I didn’t check the status of my user patches before installed the software, but after I finished the upgrade my patches were gone. I contacted TC support and they told me that the upgrade should not wipe out the user patches, so I suppose I did something else wrong, it certainly wouldn’t be the first time. But at least one other user on the TC G Natural support forum said he had the same problem.

I asked TC if they could offer a suggestion for saving my user patches, and they pointed me to Midi-Ox as a tool that can capture and restore MIDI information. Since I’m nearly totally ignorant of MIDI, I ran into a few issues but I’ve now succeeded so I thought I’d share what I’ve learned.

Hardware

The hardware you’ll need are a MIDI port on your computer (actually two of them, one for input and one for output) and one or two MIDI cables. Connect the computer MIDI OUT to the G Natural MIDI IN, connect the computer MIDI IN to the G Natural MIDI OUT.

Software

Download and install the MIDI-OX software on your computer.

Start the MIDO-OX software, you should see a screen something like this:

Select Options | MIDI Devices… and you should see this, but with your own set of available devices:

Click and highlight the input and output MIDI devices you hooked to your G Natural earlier. Click OK.

G Natural

Here we come to a possible gotcha of the first order. The 1.03 software update is advertised to enable MIDI functions. This makes sense because these functions are not yet documented in the latest manual on the TC site. So I suppose users who want to save their settings before upgrading to software version 1.03 are just out of luck. Oops. Still, once you have 1.03 installed, you’ll have a way to save settings in the future.

You get to MIDI functions by starting with the Menu button. Using the Edit D knob, scroll to the MIDI selection, then press Menu again to activate the MIDI menu.

Again using the Edit D knob, scroll to PrgChg.In: and make sure it’s set to Off. If it’s On, use Edit A, B, or C to change the value to Off.

Scroll with Edit D to PrgChg.Out: and once again make sure it’s Off.

Now scroll with Edit D to Dump System (for system wide settings) or Dump Bank (for user patches).

MIDI-OX

The particular corner of the MIDI world we’re using is called SysEx. This stands for System Exclusive, and it seems to be a method for storing and retrieving configuration information via MIDI. If you’re really curious. I’m sure there are lots of great tutorials out there in webland. Regardless, we can use MIDI-OX to capture a SysEx dump from the G Natural, save it to a file, and send the dump back to the G Natch.

In MIDI-OX, click View | SysEx… and you should see this:

In the SysEx View and Scratchpad window, click Sysex | Receive Manual Dump… and you’ll see this:

G Natural

Press the Menu button on the G Natural and you’ll see a message telling you the dump is taking place.

MIDI-OX

You’ll see a byte count in the Sysex Receive message box. Press the Done button and you can view the results of the SysEx dump. The lower Display Window now contains the data from your G Natural, displayed in Hexadecimal format.

Click Display Window | Save As… to save the SysEx dump to a file of your choice.

Restoring Saved Settings

To restore your settings, simply activate the SysEx window and click File | Send Sysex file… and navigate to the file you saved in the previous step. You don’t have to take any action on the G Natural except to have it turned on and connected to your MIDI port.

In Conclusion

Hopefully this writeup will help other G Natural users. Even though I still enjoy the great sounds and control provided by the G Natural, I’m a little disappointed that I had to figure this procedure out on my own, and gather the tools myself. I’m also disappointed that an update to the manual has not been provided to go along with the software update. We’re once again operating our machines without accurate documentation. And finally, I expected to have a computer based patch editor available when I bought the G Natural. I had one with my much less expensive Yamaha MagicStomp, so I’m really unpleasantly surprised to find that TC Electronics does not provide one. A proper editor would make saving and restoring settings a snap, and make creating and configuring patches a lot easier as well.

TC Electronics has setup a forum area where we can share experiences and possibly encourage TC to expedite updates to the documentation and to provide a patch editor. I hope to see you there.


Zoom H2

Saturday, December 1st, 2007

I definitely don’t need another recording device around here, but my Recording Gear Acquisition Syndrome is not blunted by logic. The positive comments on various guitar forums piled up until I couldn’t resist the pressure. I had to have a Zoom H2 recorder.

I bought mine slightly used on Ebay. I saved a few bucks but even at the street price of $199 this is a pretty easy purchase to scrape up. Taking the thing out of the box, it’s pretty unimpressive – light and flimsy rather than solid and sturdy. The membrane switches gave me fits until I figure out that I should use my big fat finger instead of a delicate little touch with my fingernail.

Naturally I have to do a comparison test between this little recorder and the PC rig. Here’s a picture of the setup I used:

The mics are a pair of Schoeps CMC6 bodies with MK41 caps, in a pretty careful 90 degree X/Y. The Zoom is as close to the same location as possible, using the front mics in 90 degree configuration.

I recorded my Martin OM-18GE in drop C, doing a chorus of “Silver Threads Among the Gold.” I’m posting the recordings without trying to encourage a blind test. I posted .wav files instead of mp3s, so the downloads will be a bit long, but you can do a careful comparison.

Schoeps

Zoom H2

I think anyone can hear a difference between these two samples, and I certainly prefer the Schoeps track, but if you add up the cost of duplicating the Schoeps->John Hardy->LynxTwo chain and compare it to the cost of the Zoom, well, that Zoom doesn’t sound too bad after all.

I also tested the H2 as a PC interface. The supplied USB cable and power adapter, along with the silly looking little plastic tripod stand, had me ready for some kitchen table recording in no time. One down side to this use, I have to go into the menu and setup the USB link every time I turn the H2 on. Not a big deal, but I wouldn’t mind if the unit could remember where I left off.

I don’t have any samples of this use of the H2, because I got wrapped up in doing multi-track experiments in Audacity and Reaper, but I haven’t come up with anything I am willing to make public yet. But I can say that the H2 works as a stereo USB mic with no hassle beyond the menu tweaking.

I’ve held on to my old minidisk recorder for a number of years, but it looks like I don’t need it anymore. This new recorder is going to get a lot of use around here.


Initial G Natural Explorations

Friday, August 31st, 2007

I busted the budget for a new toy – the TC Electronics G Natural. I’ve been using a simple Boss DD-3 Digital Delay for my only effect, running into either a Fishman Performer Pro amp or a PA based on an old Peavey XM-6 mixer amp. I’ve never been too thrilled with my amplified sound, so I’m starting the process of (hopefully) upgrading.

The new G Natural is a floor box with big sturdy stomp switches controlling a collection of pristine effects with a clever system for storing user settings. The box includes routing for a microphone, pickup, and line inputs, but there are some limits on how these can be combined.

I’ve been working around home with the G Natch, and I’ve used it on two gigs, so I’m beginning to get a handle on the major features and capabilities. I’m sure it will reward a lot of study and tweaking, but I’m ready to pass along some first impressions even though they’re preliminary.

I made a big goof when I first began using this device. The input gain setting is buried in the levels menu, and in the “preliminary” manual that came with my unit did not have the correct information for the unit I received, so I did not understand the importance of the “Input Gain” setting. Instead, I used too much gain to boost the ouput from the G Natural, and the result was a lot of hiss. After a day or so of frustration I discovered the correct setting, then I found the updated manual online at the TC site, and since then I’ve been extremely impressed with the sound quality and low noise of the unit. So kudos to TC for creating such a high quality box, and lemons for shipping the unit with an incorrect manual.

Even with the updated manual the information is fairly skimpy, and the organization is a bit less than ideal. But since the book (actually a PDF) is so short it’s not too big a challenge to read the whole thing a couple of times and gradually pull the pieces together.

One question I had before working my unit – can the G Natural be used as a DI or Direct Input device. A DI is a device which takes a 1/4″ high impedance unbalanced input, like a guitar pickup, and converts the signal to a balanced low impedance output on a male XLR connector. This is very handy for stage use because low impedance balanced cables can be run for long distances without signal loss or noise buildup. DIs are also used in the studio for connecting bass, guitar, or other unbalanced signals to balanced mic inputs.

Since the G Natural has a male XLR on the back, it might seem that this is a DI output, but that is not the case. This connector will only deliver the signal connected to the Mic Input, not the signal connected to the instrument input. So the simple solution won’t work. However, the 1/4″ outputs are balanced, which means that a simple adapter cable can be bought or made to provide DI functionality from the main outputs. HOWEVER, TC warns that these outputs should not be connected to an input providing phantom power. This is important, and easy to overlook. On your own mixing board, you’ll probably check phantom power and turn it off as needed, but if you’re working with various sound engineers in various venues, the chance for a mistake may be too high. And in some PA mixers, the phantom power cannot be controlled for individual channels, so this limitation may lead to other problems. In other words, I think I’m going to buy a DI to add to my signal chain before I connect the G Natural to a PA other than my own.

A look through the manual will show that all the effects needed for enhancing an acoustic sound are present – compression, eq, modulation, delay, and reverb. The unit also features a “one click” boost feature that simply raises the level for solos. Notice that there is no distortion effect included – if distortion is part of your acoustic sound, you’ll probably want a different multi-effects unit.

Finally, here are some samples. I played each clip separately, so there are plenty of performance variations. The guitar is a Martin OM-18GE with a K&K Pure Western pickup.

I miked the guitar with a Shure KSM141 set flat, cardioid pattern, about 6″ from the 12th fret, through a John Hardy M-1.

Here’s the direct pickup sound, through an M-Audio DMP3.

The pickup through the G Natural, all effects bypassed (setting F9-3).

The G Natural setting F0-1, Subtle Acoustic.

Something on the wild side, F4-3, Clean Cowboy.

F5-3, Clean Chorus.

I’ve created a few user settings, here’s the one stored at U0-2.

Next time I’ll talk about the stompbox-edness of the G Natural. There are lots of useful variations to be had by stepping on the big chrome buttons.


About the Blog

    Howdy, my name is Fran Guidry and this is my Homebrewed Music blog.

    I play Hawaiian slack key guitar and recorded my solo acoustic CD at home. Most of the recording information I find on the internet seems focused on bands, drums, multitracking, and so on but my main focus is recording solo acoustic guitar. Lately I’ve been enjoying video recording along with audio, so that shows up in the blog as well.

    I’m also a guitar nut. I love big ones and little ones, handmades and factory guitars, cheap ones and expensive ones. So I’ll be sharing the fun of exploring guitars as well, along with the challenges of amplifying acoustic guitars for live performance.

    Welcome!

Philosophy

    My recording philosophy is pragmatic, skeptical, not super critical. After all, the performance is by far the most important component of a track, and every aspect of any recording is a matter of taste.

    But I do like to know “about stuff.” Back in hifi days I learned about double blind testing. I learned that we humans can easily hear differences that don’t really exist. The more I’ve learned about our human auditory system, the more I’m skeptical of what people say they hear, especially if they claim that a particular microphone or preamp or cable has some magical property.

    I’ve only been recording since 2001, and when I started I found the usual places on the internet. I sought advice and accepted it, thought I would improve my recordings by using more expensive equipment. It didn’t work.

    Two things that did seem to lead to better recordings were experience and room treatment. Getting an appealing sound is the combination of many small details, and learning those details only comes from experience. Amd the sound of the recording space is obviously a big factor.

    I’ve only recorded seriously using digital technology, but I remember trying to record rehearsals and gigs back in analog days. I don’t have any nostalgia for analog recording and playback systems at all. I think even low end digital systems can capture marvelous recordings. So when I look at gear, I look for good specs: low noise, broad flat frequency response, wide dynamic range, low distortion. I’m not interested in colorful components, mics and preamps with a sound, I want the sound to be the sound of my guitar.

    But the last word is that I’m just learning and I hope you find something useful in my posts.